Friday, October 29, 2010

Picky-Palate's Double Pumpkin Kissed Chocolate Chunk Cookies - Week 5 of 12 Weeks of Christmas Cookies

When I happened upon this recipe over at Picky Palate I knew they were my next cookie!  Oh my goodness...pumpkin, chocolate chips, and pumpkin spice Hershey kisses.  Have you heard of these?  I hadn't, so I went out on a hunt for them.  After much searching, I finally found them on and end cap at Target.  They are quite interesting.  I'm not so certain that I would just unwrap one to snack on like a regular Hershey kiss, but in this cookie they are delightful!
This cookie has more of a muffin/cake consistency than a cookie consistency.  I made them in my muffin top pan per the suggested cooking method and they turned out great.  They were all perfectly round and cute, unlike some of my other cookies I've made recently.  I don't want to rehash bad memories, so I won't go into it here! :)  I think I may have filled them a little too full.  The recipe yields 24 muffin top sized cookies, but somehow I only ended up with 16, and no I didn't eat the other 8!  We love these cookies.  They are perfect for the fall and would be equally perfect for a Christmas gift!  Who doesn't love pumpkin and chocolate chips together?

Here's the recipe!  Stop by and check out all the other great recipes Jenny has at the Picky-Palate.  She is on a Pumpkin streak, so if you need Pumpkin recipes she's got you covered.

This is part of the 12 weeks of Christmas Cookies Link-up!  Don't forget to check out what everyone else is baking this week!
Week 5 Twelve Weeks of Christmas:

Thursday, October 28, 2010

Scrapbooking Weekend means Major Progress!

Sorry for the lack of posts this week, I'm trying to recover from a weekend away!  I spent the whole weekend at a fantastic scrapbooking retreat.  Between the socializing, the delicious meals (that were served to us, we didn't have to lift a finger), and creating 54 digital pages, there wasn't a lot of time for sleep!  I'm so excited that I was able to complete portions of our 2010 book from January to the middle of June.  I'm in love with digital scrapbooking!  I felt a little guilty about not having anything tangible to bring home to show C, but once I opened all the files to show him I felt better.  I really had done a lot!  I'm putting all my digital freebies and downloads to good use!  I just wanted to share a few of my favorites from the weekend with you guys!  Thanks for checking them out, I've added the links to the templates, papers and fonts if you are interested in downloading any of them from their respective websites!  Happy Scrapping! (Just a note: they aren't shown at the highest resolution, blogger doesn't support gigantic file sizes.  Just know that when they are printed out they will be crystal clear.)


 Park
Papers and Elements: Bounce by Shabby Princess
Font: Pea Amy from Kevin and Amanda


April
Paper and Elements: Simple Pleasures
  
Gymnastics
Paper and Elements: Happy Go Lucky
Font: Digs My Hart and Arial 
Weekends
Paper and Elements: Roseytoes Designs
Fonts: Rebekah's Birthday and the Blue Cabin (Are you starting to see that I have a little bit of a KevinandAmanda font obsession??)

Monday, October 25, 2010

Baked Potato Soup

I have been looking for a fantastic baked potato soup recipe recently.  I didn't have the courage to try any until I saw this one.  As soon as I saw it, I knew I would love it.  And I did, and so did my taste testers.  I followed the recipe for the most part, with a few exceptions:  I left out the onions, substituted whole milk and regular sour cream.  I'm not anti low fat, it's just what I happened to have in the house.  I am anti onion though, at least on my baked potatoes and baked potato soups.  Feast your eyes on this!
Don't you want to grab a spoon and dig in?  I did!  The soup was so creamy and smooth.  I mashed my potatoes until there were no chunks...I don't like chunky potato soup.  I think it gave the soup a little something extra!  And look at these toppings...oh my!  You can't go wrong with cheese and bacon!

I think that we each had two bowls, it was that good!  The flavor was fantastic.  A perfect combination of potatoes, milk and cheese!  Serve it up with some yummy rolls and dinner is ready!  It was so fast once you baked the potatoes (allow an hour to bake them in the oven) and easy!  Throw it all in a pot and watch it simmer!
I love a good soup in the fall, even though it's still 80 degrees here!  What's your favorite fall soup?

Friday, October 22, 2010

Five Minute Fudge - Week 4 of 12 Weeks of Christmas Cookies!

You are not going to believe this...a five minute fudge recipe!  Yes, it's true...it does exist.    I've had this recipe for so long that I don't even know where it came from.  The poor paper has all kinds of stains on it from my whirlwind holiday baking sessions.  This is a standard in our house around Christmas time.  I also love to make it for parties and whenever I need a chocolate fix, you know what I'm talking about.  I have to admit that I don't own a candy thermometer, they scare me.  Anything that requires a specific temperature or requires me to determine if we've reached soft ball consistency is not for me.  I'm a simple gal and that's why a love this recipe.  You don't need any fancy gadgets, just a saucepan and a spoon.  This candy doesn't care what temperature it is, it just wants to be made and eaten!  Have I mentioned that it's oh so simple?  Here's what you will need:
That's it, three ingredients!  A 14 ounce can of sweetened condensed milk, a 12 ounce bag of milk chocolate chips and 1 teaspoon of vanilla!  You can add up to 1 cup of nuts if you like - I prefer mine plain and simple though.  Can it be any easier?  Start by combining all of the ingredients in a small saucepan like so:
Cook over medium low, stirring constantly for 3-5 minutes or until your fudge starts to look like this:
Pour your mixture into an 8x8 pan that has been sprayed with cooking spray:
Resist the urge to stick a spoon in and eat it right away.  I won't tell if you taste a little bit.  A little bit spilled on the board and I had to eat it!  It will level it self out and it should now look like this:
Find a spot in your overcrowded fridge (what, you don't have to make room in your fridge for new items...I do!):
and patiently wait for at least 2 hours!  After that, cut it into small squares or feel free to get fancy with cutesy cookie cutters.  I couldn't resist!
If there's any left after you share, store it in an airtight container in the fridge.  Although, I doubt it will last long enough for that.  It's so smooth and creamy with a perfect chocolate taste.  No one will be able to eat just one!
Thanks for stopping by!  Don't forget to check out what everyone else is baking this week as part of the 12 weeks of Christmas Cookies!  I have quite a few from the previous weeks that are on my "to try" list.  Can't wait to see this weeks recipes!


Week 4 Twelve Weeks of Christmas:

Wednesday, October 20, 2010

Glittered Pumpkins

As soon as I found this tutorial, I knew I would be making glittered pumpkins soon.  I love having a few holiday decorations out, but I rarely find anything that I am willing to pay the asking price for.  Call me frugal if you want, I don't mind!  After seeing how to decorate the craft pumpkins and just how easy it looked, I couldn't wait to get started.  I went out the next day to Michael's to purchase supplies.  For under 20 bucks I have these...
Are those cute or what?  It was so easy, the hardest part was the dripping glue.  It took me a few days to finish only because I never sat down more than 30 minutes at a time to work on them.  I also made this little white one with black glitter to go with the spider pumpkin that Little Man and I made at Michael's a few weekends ago. 

That one is also super easy.  You need a black pumpkin, some pipe cleaners, white paint, glue and googly eyes.  Poke 4 holes on each side of the stem and insert the pipe cleaners.  Bend the pipe cleaners to look like creepy crawly legs, paint a mouth and glue on the eyes.  Easy and done!  We had fun making it!


Monday, October 18, 2010

Restaurants Featured on TV and How to Find Them!

So, I've admitted before that I am addicted to Food Network especially later in the evening when the house is quiet and I have some time to digitally scrapbook or catch up on blogs.  I love having the Food Network on in the background to inspire me.  I was listening in the other day while Diners, Drive-in's and Dives was on.  Guy did a segment about Lankford Grocery in Houston and how they have the best hamburgers in the area.  I set out on a mission to find it and get these burgers as soon as possible.  I found their website and we decided that we would check it out on Friday after a trip to the zoo with the Little Man.  Luckily I wrote down awesome directions or else we never would have found it.  (We don't have smartphones like the rest of the world, yet!)
There are quite a few burgers to choose from, I stuck with the standard Cheeseburger, C had the Wasabi burger and Little Man had a grilled cheese.  Here's what mine looked like...and yes it was the size of my face!
I couldn't resist taking a big bite before I took the picture, it smelled so good I didn't want to wait.  The burgers were good.  I don't know that we would make a special trip back for them, but if we happened to be in the area we would probably stop by again.  It's such a sweet little Mom 'n Pop shop.  It started out as a grocery and when the grill took over, they dropped the groceries.  Not such a bad idea, considering how crowded it was for lunch.
The same day that I was on a search for Lankford Grocery I read about this website on K&A's blog.  You put in the city you are searching for and it gives you all the restaurants, cafes, diners, etc. that have been featured on certain shows.  I see that it has The Best Thing I Ever Ate, Diner's, Drive-in's and Dives, Throwdown with Bobby Flay and a few others.  It's an awesome tool to find the places you have heard about but can't remember the names.  And it's especially great if you are traveling to a new city and want to try out some great food.  I can't wait to explore the website more and see what I find.
I love finding places like this.  What's your favorite featured on TV restaurant?

Sunday, October 17, 2010

"I Forgot the Cashews" Chicken

 Does anyone see anything missing in the photo above.  My plan was to make cashew chicken, but I forgot the stinking cashews.  Who does that?  Apparently someone in a hurry to get dinner on the table.  Honestly it didn't cross my mind that I was making Cashew Chicken and didn't even get the cashews out of the pantry!  Oh well, call it Chicken if you will...it still tasted great.  I love Rachael Ray's Park City Cashew Chicken recipe, but change it up a bit.  Here's my adapted version.
Cashew Chicken
Ingredients:
2 tablespoons olive oil
1.5 lbs. chicken breast, cut into pieces
1 green bell pepper, seeded and thinly sliced
1 small onion, thinly sliced
4 garlic cloves, chopped
1 1/2 tablespoons chipotle powder (I used Mrs. Dash Southwest Chipotle seasoning)
1 tablespoon ground cumin
2 tablespoons honey
1/4 cup maple syrup
1 cup cashews (A must for cashew chicken)
Your favorite rice (I chose Minute Brown Rice in the microwave, sticking with my easy dinner theme)
Directions:
Heat large skillet over high heat.  Add the olive oil then the chicken.  Brown the chicken, then add the onion, bell pepper and garlic.  Cook for 3-4 minutes then add the chipotle powder and cumin.  Add the honey and maple syrup, stir and turn off the heat.  Add the cashews and serve!

I was so excited to present this at the dinner table tonight...
and then C looked at me very politely and asked "Are there any cashews in it?"  I didn't know what to say..."Um, yep it's cashew chicken right?"  Nope, I just laughed and said darn I forgot.  Other than that mishap, it was fantastic.  We love the kick that comes from the chipotle powder.  If you can't find that, you can always use a little chipotle in adobo from the can.  I will warn you though, it can be very spicy.  The last time I made this dish with it, I couldn't even it it.  That's why I play it safe with the powder.  You can always add more for those who like it extra spicy, just pass it around the dinner table.  We serve it over brown rice with a few egg rolls on the side.
As Rachael Ray says, it's "Make Your Own Take-out Night."  And it's ready in just 30 minutes, quicker than they can deliver to my house, how about you?

Friday, October 15, 2010

Creme de Menthe Truffles - Week 3 of 12 Weeks of Christmas Cookies!

Mmm...Andes mint truffles!  I am a fan of Andes mints.  I love it when they come with the check at a restaurant.  That doesn't happen very often, but when it does it's such a treat!  I saw this recipe in my Pillsbury Holiday Baking November 2006 issue and couldn't wait to get started.  I had everything I needed in the pantry.  Did I mention that I basically have the baking aisle in my pantry?  :) 
So here's what you'll need:
Creme de Menthe Truffles
1/2 cup whipping cream
1 bag (10 oz.) creme de menthe baking chips
1 cup semisweet chocolate chips
10 oz. vanilla-flavored candy coating
Heat whipping cream over low heat 2 to 3 minutes or until cream is warm.  Remove from heat.  Add baking chips and chocolate chips; stir until melted and smooth.  Cover; refrigerate 1 hour or until firm.**  Line cookie sheet with waxed paper.  Shape mixture into 1-inch balls, dusting hands with powdered sugar or cocoa if necessary**.  Refrigerate 30 minutes.  Heat candy coating as directed on package (I love the kind you can microwave, just my personal preference).  Dip 1 truffle at a time in white candy coating to coat.  Return to waxed paper-lined cookie sheets.  Store in refrigerator.  Recipe says it yields 3 dozen truffles (I was only able to make 2 dozen, I guess I rolled them too big)!
**Cook's Notes
After melting the chocolate and putting it in the fridge to harden, Little Man woke up.  I had to come back to it about 4 hours later to try and shape the balls.  I had planned on using my Pampered Chef cookie scoop to shape them easily, but as soon as I placed it in the chocolate I knew I was in trouble.  The chocolate had been in the fridge  too long and had hardened.  I broke my scoop trying to get it out of the chocolate...sniff..sniff.  It was a sad moment, now I have to get a new one (which means I'll end up with more than just that)!  I ended up letting the chocolate sit on the counter for a bit to soften.  I also found that rubbing your hands with powdered sugar or cocoa created a disastrous mess.  Imagine having melted chocolate all over your hands and then adding cocoa powder too it...just think about it!  Not pretty!  Last, the only truffle that will have a pure white coating will be the first one.  The warm coating starts to melt the truffle a little on the outside and you end up with small streaks of chocolate in your white coating.  This isn't a huge deal unless you are a perfectionist, but who has time for that? :)  Okay, enough notes time for the verdict!
These were so A.M.A.Z.I.N.G.L.Y. delicious!  Yes, it required all caps and the exaggerated emphasis!  If I had tasted the inside of the truffle before coating it, I probably would have sat down with a spoon and the bowl of chocolate and devoured it in it's entirety.  The truffle is so smooth and creamy and has the perfect mint flavor.  And to top it off, it has a candy coating.  Who isn't looking for that in a truffle?  I shared these with a group one night this week and they were a hit.  The whole batch was completely gone within 24 hours!  C thought they were amazing and tried to hide them from the group and keep them all to himself...I may have found his new weakness.  Homemade truffles!
This is such a good base recipe too.  Imagine the possibilities...mix in a different type of chip and you have a whole new truffle.  Can anyone say chocolate peanut butter truffles?  Oh my!
Enjoy the recipe!  Don't forget to check out the links below to see what the rest of the group is baking this week!
Week 3 Twelve Weeks of Christmas:

Thursday, October 14, 2010

Crockpot Beef Strips and Mushrooms

My sister-in-law emailed me some fantastic crockpot recipes after we recently had a conversation about how much we love our crockpots.  I could go on for days and days about how much I love it, but I'll spare you.  This one sounded like a winner the first time I read it, and it couldn't be simpler.
Beef Strips and Mushrooms
1 pound top round steak
1 package (16 ounce) frozen stir fry mix
1 can (10 ounce) Golden Mushroom Soup
1 package (8 ounce) sliced fresh mushrooms
1 envelope onion soup mix
Slice steak diagonally across grain into thin strips (1/2 inch or so).  Combine all ingredients in slow cooker and cook 3-4 hours on high or 6-7 on low.  Serve over rice or your choice of pasta.

I chose a broccoli, carrot and water chestnut stir fry mix.  The original recipe called for a pepper stir-fry mix which for the life of me I could not find at the store.  I was tired of searching and grabbed the nearest one.  Served over rice, this is the perfect week night dish.  It's a one-dish meal that reminds me of a very saucy beef and broccoli.  It had a wonderful flavor and the beef was soooo tender.  I cooked it for about 3 1/2 hours on high and it was perfect.  The vegetables almost melted in your mouth and the mushroom flavor was excellent.  I love it...I'll be making it again soon.  Enough said!

Monday, October 11, 2010

Favorite Digital Scrapbooking Template Sites

I have been scouring the web to find the best FREE digital scrapbooking templates.  Being new to digital scrapbooking, I just don't have the talent (yet) to create my own beautiful layouts.  Maybe I have the talent, but not the patience to sit and figure it out.  That's where these great websites come in.  They have free templates that you can download and use.  All you have to do is choose your papers and pictures and basically drag and drop.  There are a few more steps than that, but you get the idea.  If you are new to digital scrapbooking, check out my first post here.
Here are my favorite ones so far:

The Shabby Shoppe - I know I go on and on about this site, but I just l.o.v.e. it!  It's so fresh and the freebies are fantastic!

Manda Girl - She has great two page layouts that have room for lots of photos.  I have a hard time narrowing down which photos to use for each event, so these are great.  Just my style!

Scraplifter's Challenge - Each month they share a new challenge.  You can back track through the months and pick up the older ones.

Simple Scrapper - I just stumbled upon this website like 10 minutes ago and let me tell you I'm impressed!  It's a place where people can go and upload templates that they have made (beginners, pros, in betweens) and every one can download them!  I downloaded about 3 or 4 in just the first minute of being there! :)

So there you have it, the best places (that I've found so far, there are so many more to check out) for FREE digital templates.  I can't emphasize the free enough.  Zip, zilch, nada!

Beef and Bean Bake

Fall is in the air, which means it's time to break out the crock pot and make chili and stew.  I decided to try this Beef and Bean Bake tonight and it did not disappoint.  It's from my Southern Living Slow Cooker Cookbook (the one with the brisket sandwich on the front).  I wouldn't consider this your standard slow cooker recipe.  It required some "prep" cooking, which I don't usually like.  Since the recipe only cooks for 3 to 4 hours in the crock pot, I knew I would have time to do the prep cooking during Little Man's nap.  If I were gone from the house all day, this recipe would not be on my list of things to try.  Since I'm so fortunate to stay at home, I was able to try it out.
Here's the recipe:
Beef and Bean Bake
(adapted from Southern Living)
3 bacon slices
1 pound ground beef
1 onion, chopped
1 (15 oz.) can lima beans, drained
1 (15 oz.) can pork and beans, undrained
1 (15 oz.) can light red kidney beans, drained
1/2 cup ketchup
1/2 cup barbeque sauce
1/4 cup firmly packed brown sugar
1 teaspoon dry mustard

Cook bacon until crisp; crumble and set aside.  Cook beef and onion in large nonstick skillet over medium heat until beef is browned.  Place bacon, beef mixture, and remaining ingredients in slow cooker.  Stir well.  Cover, cook on high heat setting for one hour.  Reduce to low heat setting and continue to cook for 3 to 4 hours.  Yields 6 one cup servings.

Cook's notes:
The original recipe calls for 1/2 pound ground beef, I buy mine in pound increments so I just used the whole thing.  Tasted good to us - I don't think a half of a pound would be enough.  I used Stubb's original sauce.  It's the only brand we use.  Don't remember that? Read this.  I always use a slow cooker liner.  Always, always, always!  It makes for such an easy cleanup and you don't have to leave your crock pot in the sink to soak for days on end!  If you haven't tried them, you must.  You can find them by the foil and baggies, Reynold's makes them...not sure if anyone else does too!

Verdict:
This was surprisingly sweet, not in a bad way...just a surprising way.  We aren't used to sweet chili or BBQ, so for us it was different.  Don't take that in a negative way, we loved it!  The beans were so nice and tender and it thickened up to a nice consistency.  The combination of BBQ sauce, brown sugar, ketchup and dry mustard is outstanding.  I think I'll try that combo on chicken soon!  Little Man wasn't too excited to eat it with a spoon out of the bowl, but we gave him some crackers to "dip" into it and that made his day.  This made more than enough for the three of us for dinner, lunch tomorrow and one more container for another day.  I thought about freezing it to see how it survives.  We'll see how much gets eaten tomorrow and then maybe I will.
Don't you love the bowl?  It was a gift from my mom for our anniversary last year.  It came with a big chili pot and four of these cute bowls!  I wish I used them more often, but I'm always in a hurry to get dinner on the table I forget about them.  Reminds me of the "chili" bowls we used when I was a kid.  They were these gigantic mugs that had the word "chili" printed all over them.  I was so excited when it was chili pie night because I knew I would get to eat out of those bowls.
I'm searching for other good fall/winter slow cooker meals.  What's your favorite?

Thursday, October 7, 2010

Apple Streusel Cheesecake Bars- Week 2 of 12 Weeks of Christmas Cookies

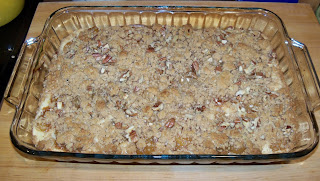
It's time for Week 2 of the Christmas Cookies!  I can't wait to see what everyone else has in store this week.  I chose to make Apple Streusel Cheesecake Bars from my Betty Crocker Fall Baking 2009 book.  You can also find it here.
Wow!  That's all I can say about this delicious treat.  Okay, so that's not all I can say, but it's the first thing I said!  As these were baking, the whole house had the scent of fall!  As soon as they came out of the oven, I wanted to get a fork and dive in...instead I waited patiently as called for in the recipe. 

You need to make these...today!  And for every fall gathering that you may possibly have on your calendar.  Seriously...you won't regret it.  I can't guarantee that these bars will last past the first few hours!  They remind me of my favorite Cheesecake Factory cheesecake flavor: Dutch Apple Caramel Struesel.  Mmm...now I can have something similar at home anytime I want.  So let's get started:

Apple Streusel Cheesecake Bars

1 pouch oatmeal cookie mix (I used Betty Crocker brand)
1/2 cup cold butter
2 packages of cream cheese (8 oz. each), softened
1/2 cup sugar
2 tablespoons flour
1 teaspoon vanilla
1 egg
1 can apple pie filling
1/2 teaspoon ground cinnamon
1/4 cup chopped pecans or walnuts

Heat oven to 350 degrees.  Spray 13x9-inch pan with cooking spray.  Place cookie mix in large bowl, cut in butter until it resembles coarse crumbs (with pastry blender or pulling 2 knives through mixture in opposite direction).  Reserve 1&1/2 cups crumb mixture, press remaining crumbs in bottom of pan.  Bake for 10 minutes.  Meanwhile, in large bowl, beat cream cheese, sugar, flour, vanilla and egg with electric mixer on medium speed until smooth.
Spread cream cheese mixture evenly over partially baked crust.  In medium bowl, mix pie filling and cinnamon.  Spoon evenly over cream cheese mixture.  Sprinkle reserved crumbs over top.  Sprinkle with pecans.
Bake 35-40 minutes or until light golden brown. Cool about 30 minutes.  Refrigerate to chill, about 2 hours.  Cut into 6 rows by 4 rows.  Cover and refrigerate any remaining bars.

I don't own a pastry blender (if I did, it would look like this in Blue Willow or Buttercup...hint, hint) so I had to resort to the two knives method which was not fun!  I must admit that I gave up on that method and crumbled it with my hands!  Much faster.  Also, the original recipe called for walnuts, but I happened to have pecans in the freezer so I used those.  They didn't really do a lot for the bars in my opinion.  I think you need a lot more of them to get a good pecan flavor, otherwise I would just leave them off next time.
They were a winner all the way around the table tonight.  C said they might be one of the best things I've made lately.  He has already flipped through this book and marked a few for the fall cooking lineup.  I can't wait to try the rest of them.  Little Man kept saying more, more!  I think we are creating a miniature cookie monster...like father, like son!
I hope your family loves it as much as mine does!
Week 2 Twelve Weeks of Christmas:

King Ranch Casserole


I was perusing Tasty Kitchen recently and found this yummy looking King Ranch Casserole.  I tried it out last night and it was as good as anticipated.  I'm sure every one has their own King Ranch recipe, but I just had to give this one a try.  It was super simple and aside from cooking the chicken and sauteing the veggies, it required little effort.  It had just the right amount of crunch from the chips, gooeyness from the cheese, and zip from the bell peppers. 
I made a few slight changes from the original recipe, which turned out nicely.  I somehow forgot to purchase Rotel at the grocery store...luckily I had a can of fire roasted diced tomatoes in the pantry.  It saved our dinner, I have no idea why I even had it, but I'm so glad I did!  I also used 1/2 of an onion instead of a whole one, too much onion can be a bad thing.  And my last modification was to up the temperature to decrease the cooking time.  I ended up at 350 degrees for about 25 minutes.  I'm impatient when it comes to dinner and if it's not on the table in 30 minutes, it's not fit for me!
I should also add that this makes a heaping casserole, so be prepared for leftovers.  The casserole loses it's crunch during the subsequent days, but it still tastes delicious!

Monday, October 4, 2010

12 Weeks of Christmas Cookies!

I have decided to join in on a 12 week Christmas cookie bake coordinated by April over at AbbySweets.  Every Friday I will post a new cookie recipe for you to try out...and so will another 40+ bloggers.  Check out the pictures and links below each weeks post to see what everyone else is baking!  I'm so excited to participate.  This is my first time to do anything like it, so I hope I can keep up.  A cookie a week shouldn't be too hard, it's just the planning ahead that might trip me up!  Although I have lots of recipes to choose from, so it shouldn't be too hard finding enough.  Don't you think?

And that's not even the tip of the iceberg when it comes to my cookbooks (I might have a cookbook problem)!
I was a little late getting in on the first week, so I just linked up my Chocolate Peanut Butter Cookies that I posted a few weeks back.  Don't be worried though, you will get 11 new recipes from me starting this Friday!  I'm so excited to share them with you.  Check back on Fridays to see what I and the other bloggers are baking!
Week 1 Twelve Weeks of Christmas:

Friday, October 1, 2010

The Shabby Shoppe Template Challenge

Last night I spent a few minutes working on my layout for The Shabby Shop Template Challenge Number 5.  Check out the information here.  You can download the free template there and upload it to the gallery.  Everyone who participates is entered to win a $25 Shoppe giftcard.  The winner is selected randomly so everyone has the same chance of winning.   Your download includes a Piece of Cake Page that has already been completed, all you have to do is insert your pictures, or if you are feeling more creative you can pick your own digital papers like I did.  Here's the layout that I made with the Sandbox kit I bought yesterday!  It turned out so cute, I can't wait to do page two for the layout.
This is my second challenge.  If you want to see the first one I did, check out my Shabby Shoppe gallery uploads here.  I am loving digital scrapbooking!

LinkWithin

Related Posts with Thumbnails